A friend of mine shared this recipe with me several years ago, and it's one of my favorites. It's an easy varation on the cold version of this salad and I must say it tastes GREAT! This recipe can be used as a main dish for supper, an easy lunch or for a brunch, bridal shower or baby shower.
I have been cravning this for a few weeks now and decided that today this is what we're having for supper here in our house. I can hardly wait for suppertime! I made a double batch of this because it's so easy and also because our good friends S & E are having their 3rd baby today!!! I can't wait to meet him/her and have some snuggle time! This was just one easy meal that I could prepare for them ahead of time and throw it in the freezer until I bring them some meals. I hope that they will like it as much as we do here.
HOT CHICKEN SALAD
INGREDIENTS:
2 C. Chicken Breasts; cooked and chopped (I used the cut up chicken from GFS)
1-2 C. Finely Chopped Celery
1/2 C. Toasted Slivered Almonds
3/4 C. Mayonnaise
1-2 C. Baked Potato Chips; crushed (I used Lays Baked)
1/2 tsp. Salt
2 Tbsp. Grated Onion (I used Dried Diced Onion)
2 Tbsp. Lemon Juice
1/2 C. Grated Cheddar Cheese (I always use a little more because cheese is so yummy!)
Preheat oven to 425. In a large bowl combine Chicken, Celery, Almonds, Salt, Onion, Juice, Mayo, Chips, and Cheese. Mix well. Transfer to a lightly greased 1 1/2 quart baking dish. Bake for 10 minutes.
If made and put right into freezer. Preheat oven to 350 and bake for 30 minutes.
I serve this on warm Pillsbury Crescent Rolls!
I hope that you will give this recipe a try and let me know what you think of it! Thanks for stopping by! :-)
Monday, August 29, 2011


Monday, August 22, 2011
A Very Versatile Meal Idea!
My wonderful Momma called me up last week and asked if the bro and I would like to meet her for lunch at a restaurant we used to go to in Kalamazoo when I lived there. She was traveling back through the area after dropping my Gramma back off at her house in Illinois. We were both about an hour from the restaurant, so it worked out perfectly. Well, Mom ordered a Summer Chicken Salad from them and it was wonderful! We did a little inspecting of this salad and I decided that I could probably make something similar. The parents were coming into town this past weekend and I thought that this salad would be perfect for Sundays lunch!
It turned out pretty great, if I do say so myself. I would HIGHLY recommend this to anyone looking for a great salad idea!
SUMMER BLUEBERRY CHICKEN SALAD
INGREDIENTS:
2 C. Small Cubed Chicken Breasts (I used a bag of frozen cubed chicken breasts from GFS)
1/4 C. Mayo
1/4 C. Miracle Whip
1/4 C. Coleslaw Dressing
3/4 C. Broccoli; cut up
1 Pint Blueberries
1/2 C. Sunflower Seeds
3/4 C. Red Onion; chopped
Mix all of the ingredients together. It tastes the best if made up several hours or even the night before using to let the flavors meld together. Serve or lettuce or Spinach.
I served ours over Spinach:


**NOTE** I made these recipes up as I went, there wasn't one to follow. You may adjust measurements as needed.
ENJOY!
It turned out pretty great, if I do say so myself. I would HIGHLY recommend this to anyone looking for a great salad idea!
SUMMER BLUEBERRY CHICKEN SALAD
INGREDIENTS:
2 C. Small Cubed Chicken Breasts (I used a bag of frozen cubed chicken breasts from GFS)
1/4 C. Mayo
1/4 C. Miracle Whip
1/4 C. Coleslaw Dressing
3/4 C. Broccoli; cut up
1 Pint Blueberries
1/2 C. Sunflower Seeds
3/4 C. Red Onion; chopped
Mix all of the ingredients together. It tastes the best if made up several hours or even the night before using to let the flavors meld together. Serve or lettuce or Spinach.
I served ours over Spinach:

There was still quite a bit of this yummy goodness left after the four of us had our salads, so my Momma suggested that I could cook up some noodles and add that in and make it into a pasta salad. What a GREAT idea! I did this, and also added in:
1 Pint Blueberries (Another pint)
3/4 C. Broccoli; chopped
1/4 C. Mayo
1/4 C. Coleslaw Dressing
1/2 C. Sunflower Seeds
2 C. Elbow Macaroni; cooked el dente
Here's how it turned out:

See, I told you that this recipe was pretty versatile! **NOTE** I made these recipes up as I went, there wasn't one to follow. You may adjust measurements as needed.
ENJOY!
Wednesday, August 10, 2011
A Ever So Scrumptious Fruit Accompaniment
Last night I hosted a Norwex Party in my home. Norwex is a wonderful company that has come up with some AWESOME environmentally safe cleaning products! My great friend E. introduced me to them, and took me to my first party. Her cousin B. sells these fabulous products, and really puts on a GREAT show! Norwex makes cleaning cloths that are Antibacterial--meaning they will KILL the bacteria, and all you need to do is get them wet with a little water and scrub away...whether it's getting spots out of your carpet, car seats, washing your counters, washing windows, cleaning your sinks or tub, you name it and presto they are clean! At one demonstration B. sprayed PAM Cooking Spray on a customers window and let it sit...she then took a wet antibac Enviro Cloth and wiped the window down, then a dry window cloth and dried...amazingly the PAM was completely gone and there was not a single streak on the window! It's AMAZING! I used B.'s Cleaning Paste last night and a damp Enviro Cloth to scrub my Brushed Stainless Kitchen Sink and it now shines like it's brand spanking new. I am LOVING the products that I have, especially the Anitbac Dusting Mitt!!!! This thing literally PICKS up the dust and grabs it, instead of just pushing it around. It reduces the amount of times per week that you have to dust! I can't wait for all of the FREE items to arrive that I earned from my party last night. Thanks so much to the 14 ladies that showed up, I hope that you had a great time and that you'll enjoy your products as much as I do! For anyone else, if you would like to know more about these amazing products please leave a comment and I will get you some information and let B. know of your interest!
So, now that I've rambled on I want to share the recipe for the Fruit Dip that I made for my party last night. It is a typical fruit dip and so simple to make, but of course, I added a little twist to it! You know me, I can't make a recipe the way it's supposed to be made I have to add a spin all my own. I think that it turned out pretty well.
AMAZING FRUIT DIP
INGREDIENTS:
1 (8 oz). Cream Cheese; softened
1 (7 oz.) Jar Marshmallow Cream (Fluff)
2 Tbsp. Pampered Chef Coconut Lime Sauce
Mix the Cream Cheese and Marshmallow Cream together; make sure it's well incorporated and smooth. Stir in the Sauce. Chill before serving. Serve with all types of fruit.
**NOTE** If you don't have the Coconut Lime Sauce to add you could add 1 1/2 Tbsp. Sugar and 1 tsp. Vanilla to add flavor. You could also add a little bit of Cherry Juice to tint the dip pink.
This is a simple and easy dip to take to any family party or get together, and it really tastes like you've slaved on a great dip! Please give it a try!!!! :-)
So, now that I've rambled on I want to share the recipe for the Fruit Dip that I made for my party last night. It is a typical fruit dip and so simple to make, but of course, I added a little twist to it! You know me, I can't make a recipe the way it's supposed to be made I have to add a spin all my own. I think that it turned out pretty well.
AMAZING FRUIT DIP
INGREDIENTS:
1 (8 oz). Cream Cheese; softened
1 (7 oz.) Jar Marshmallow Cream (Fluff)
2 Tbsp. Pampered Chef Coconut Lime Sauce
Mix the Cream Cheese and Marshmallow Cream together; make sure it's well incorporated and smooth. Stir in the Sauce. Chill before serving. Serve with all types of fruit.
**NOTE** If you don't have the Coconut Lime Sauce to add you could add 1 1/2 Tbsp. Sugar and 1 tsp. Vanilla to add flavor. You could also add a little bit of Cherry Juice to tint the dip pink.
This is a simple and easy dip to take to any family party or get together, and it really tastes like you've slaved on a great dip! Please give it a try!!!! :-)
Saturday, August 6, 2011
A Quick Treat To Make
I made a dinner for friends this week, as they had a death in their family and had family in from out of town. I wanted to try and help out a little bit and make things a bit easier. I made them Bowtie Pasta Salad, a Fruit Salad and these yummy bars. I can't believe that I haven't posted them on here yet. What is wrong with me? I must be losing it, or something! haha
These bars literally take about 5 minutes to make, and could really take just that long to eat the whole 9x13 pan of them as well. I had to make 2 pans because I wasn't going to be able to make it out of the house if I didn't make the brother some of his own! I think that he thinks that I've neglected him lately because I haven't made these in SO LONG. SORRY J. just didn't really think about it.
CHOCOLATE CHIP PEANUT BUTTER RICE KRISPIE BARS
INGREDIENTS:
1 C. Sugar
1 C. Karo Syrup
1 C. Peanut Butter (I use Chunky)
6 C. Rice Krispie Cereal
1 1/2 C. Chocolate Chips (I just use the whole bag! What can I say, I'm a rebel!)
In a large pot mix the Sugar and Karo Syrup. Place over heat and allow to come to a slow boil; stirring constantly. I let mine boil at the edges of the pan for about 1 minute. Turn off the heat. Immediately add in the Peanut Butter and stir to melt. Add in Rice Krispies and stir to thoroughly coat. Add in Chocolate Chips and stir them through. Pour mixture into greased 9x13 pan and press to fit. Allow to cool for 10 minutes and then cut into squares.
I told you that this was one simple recipe! Trust me, it's a great twist on an old favorite!
These bars literally take about 5 minutes to make, and could really take just that long to eat the whole 9x13 pan of them as well. I had to make 2 pans because I wasn't going to be able to make it out of the house if I didn't make the brother some of his own! I think that he thinks that I've neglected him lately because I haven't made these in SO LONG. SORRY J. just didn't really think about it.
CHOCOLATE CHIP PEANUT BUTTER RICE KRISPIE BARS
INGREDIENTS:
1 C. Sugar
1 C. Karo Syrup
1 C. Peanut Butter (I use Chunky)
6 C. Rice Krispie Cereal
1 1/2 C. Chocolate Chips (I just use the whole bag! What can I say, I'm a rebel!)
In a large pot mix the Sugar and Karo Syrup. Place over heat and allow to come to a slow boil; stirring constantly. I let mine boil at the edges of the pan for about 1 minute. Turn off the heat. Immediately add in the Peanut Butter and stir to melt. Add in Rice Krispies and stir to thoroughly coat. Add in Chocolate Chips and stir them through. Pour mixture into greased 9x13 pan and press to fit. Allow to cool for 10 minutes and then cut into squares.
I told you that this was one simple recipe! Trust me, it's a great twist on an old favorite!
The BEST Barbecue Sauce EVER!
Well, okay I might just be a little bit biased, but seriously this stuff is wonderful! The best part is that it's so easy to make and it lasts for a long time after it's made! I made a batch of this up the other day so that we could enjoy some Sloppy Joes, and boy did it ever hit the spot!
I must mention that this is a recipe that came from my Gramma (my Mom's Mom), and I'm so glad that she's shared it with us!
BARBECUE SAUCE
INGREDIENTS:
2 Tbsp. Butter
1 Medium Onion; chopped
2 Tbsp. Vinegar
2 Tbsp. Brown Sugar
1 Small Bottle Catsup (1 3/4 Cups)
3 Tbsp. Worcestershire Sauce
1 Tbsp. Prepared Mustard
1 C. Water
1/2 C. Celery; chopped
Salt & Pepper to taste
Place Butter in saucepan and melt. Add Onion and brown. Add all other ingredients and cook slowly for 15 minutes.
See, I told you that it was VERY simple to make! All I do after that is brown up some ground beef in another pan and pour on the amount of sauce that I'd like. The rest can be refrigerated or frozen! I hope that you'll give this a try and let me know what you think!
I must mention that this is a recipe that came from my Gramma (my Mom's Mom), and I'm so glad that she's shared it with us!
BARBECUE SAUCE
INGREDIENTS:
2 Tbsp. Butter
1 Medium Onion; chopped
2 Tbsp. Vinegar
2 Tbsp. Brown Sugar
1 Small Bottle Catsup (1 3/4 Cups)
3 Tbsp. Worcestershire Sauce
1 Tbsp. Prepared Mustard
1 C. Water
1/2 C. Celery; chopped
Salt & Pepper to taste
Place Butter in saucepan and melt. Add Onion and brown. Add all other ingredients and cook slowly for 15 minutes.
See, I told you that it was VERY simple to make! All I do after that is brown up some ground beef in another pan and pour on the amount of sauce that I'd like. The rest can be refrigerated or frozen! I hope that you'll give this a try and let me know what you think!
Saturday, July 23, 2011
Another Must Try Dessert
I told you that I had more than one recipe to share today!!! Here's another yummy one!
CARAMEL-FILLED CASHEW CUPS
INGREDIENTS:
1 3/4 C. Salted Cashews
2 Tbsp. Butter; melted
1/4 C. Light Corn Syrup
28 Caramels; unwrapped
2 Tbsp. Milk
1/3. C. Bittersweet Chocolate Morsels (I omitted)
Preheat oven to 350. Lightly spray cups of Deluxe Mini-Muffin Pan with nonstick cooking spray. Finely chop Cashews using Food Chopper (I used Manual Food Processor). Combine Cashews, Butter and Corn Syrup in Classic Batter Bowl; mix well. Using Adjustable Measuring Spoon (about 1 Tbsp.) divide Cashew Mixture evenly among cups of pan. Gently press tops of cashew mixture with lightly floured Mini-Tart Shaper to flatten tops; bake 6-8 minutes or until edges are golden brown. Meanwhile, combine Caramels and Milk in clean Batter Bowl. Microwave, uncovered, on HIGH 2-3 minutes or until melted and smooth, stirring every 30 seconds. Remove pan from oven to Stackable Cooling Rack. Gently press hot cashew mixture again with tart shaper to form cups. Let stand 5 minutes. Grasp edges of each cup and twist gently to loosen; remove cups from pan. Divide melted caramel among cups using measuring spoon. Place chocolate morsels in 1 Cup Prep Bowl; microwave, uncovered, on HIGH 1 minute or until mostly melted, stirring every 20 seconds. Spoon melted chocolate in resealable plastic bag. Trim corner of bag with Utility Knife; drizzle chocolate over caramel. Serve warm or at room temperature.
Here's my finished treat:
 I haven't tried these yet, but they sure look delicious!
CARAMEL-FILLED CASHEW CUPS
INGREDIENTS:
1 3/4 C. Salted Cashews
2 Tbsp. Butter; melted
1/4 C. Light Corn Syrup
28 Caramels; unwrapped
2 Tbsp. Milk
1/3. C. Bittersweet Chocolate Morsels (I omitted)
Preheat oven to 350. Lightly spray cups of Deluxe Mini-Muffin Pan with nonstick cooking spray. Finely chop Cashews using Food Chopper (I used Manual Food Processor). Combine Cashews, Butter and Corn Syrup in Classic Batter Bowl; mix well. Using Adjustable Measuring Spoon (about 1 Tbsp.) divide Cashew Mixture evenly among cups of pan. Gently press tops of cashew mixture with lightly floured Mini-Tart Shaper to flatten tops; bake 6-8 minutes or until edges are golden brown. Meanwhile, combine Caramels and Milk in clean Batter Bowl. Microwave, uncovered, on HIGH 2-3 minutes or until melted and smooth, stirring every 30 seconds. Remove pan from oven to Stackable Cooling Rack. Gently press hot cashew mixture again with tart shaper to form cups. Let stand 5 minutes. Grasp edges of each cup and twist gently to loosen; remove cups from pan. Divide melted caramel among cups using measuring spoon. Place chocolate morsels in 1 Cup Prep Bowl; microwave, uncovered, on HIGH 1 minute or until mostly melted, stirring every 20 seconds. Spoon melted chocolate in resealable plastic bag. Trim corner of bag with Utility Knife; drizzle chocolate over caramel. Serve warm or at room temperature.
Here's my finished treat:

A Delish Dessert!
I recently received the brand-spanking new Season's Best Cookbook from The Pampered Chef. It is the Fall/Winter 2011 Edition and it has some very yummy recipes in it! Today I tried out three of them and wanted to share them with you!
MINI CARROT CAKE CUPS
INGREDIENTS:
MINI CAKES:
1 Small Pkg. Yellow Cake Mix (9oz.)
1 1/2 tsp. All Spice
1 Egg
2 Tbsp. Vegetable Oil
2 Medium Carrots; peeled, divided
FILLING & GARNISH:
6 Oz. Cream Cheese; softened
3/4 C. Powdered Sugar
1/2 C. Cool Whip; thawed
Chopped Walnuts (optional)
Preheat oven to 350. Spray cups of Deluxe Mini-Muffin Pan with nonstick cooking spray. For mini-cakes, combine Cake Mix, Allspice, Egg and Oil in Classic Batter Bowl; stir until ingredients are moistened. (Mixture will be very thick. Grate carrots using Ultimate Mandoline fitted with grating blade. Stir 3/4 Cup of the Carrots into batter; set aside remaining carrots for garnish. Using Adjustable Measuring Spoon, divide batter evenly among cups, filling cups about two-thirds full; bake 11-13 minutes or until mini-cakes feel firm to the touch. Meanwhile, in clean Batter Bowl, whisk together Cream Cheese and Sugar until smooth; fold in Cool Whip. Spoon Cream Cheese Mixture into resealable plastic bag (I used Easy Accent Decorator); secure bag and set aside. Remove pans from oven to Stackable Cooling Rack. Press tops of mini-cakes with lightly floured Mini-Tart Shaper to make slight indentations. Cool in pan 3 minutes. Carefully remove mini-cakes from pan; cool 5 minutes. Trim corner of Cream Cheese-filled Bag with Utility Knife; pipe filling evenly into mini-cakes. Garnish with Chopped Walnuts and reserved Carrots, if desired.
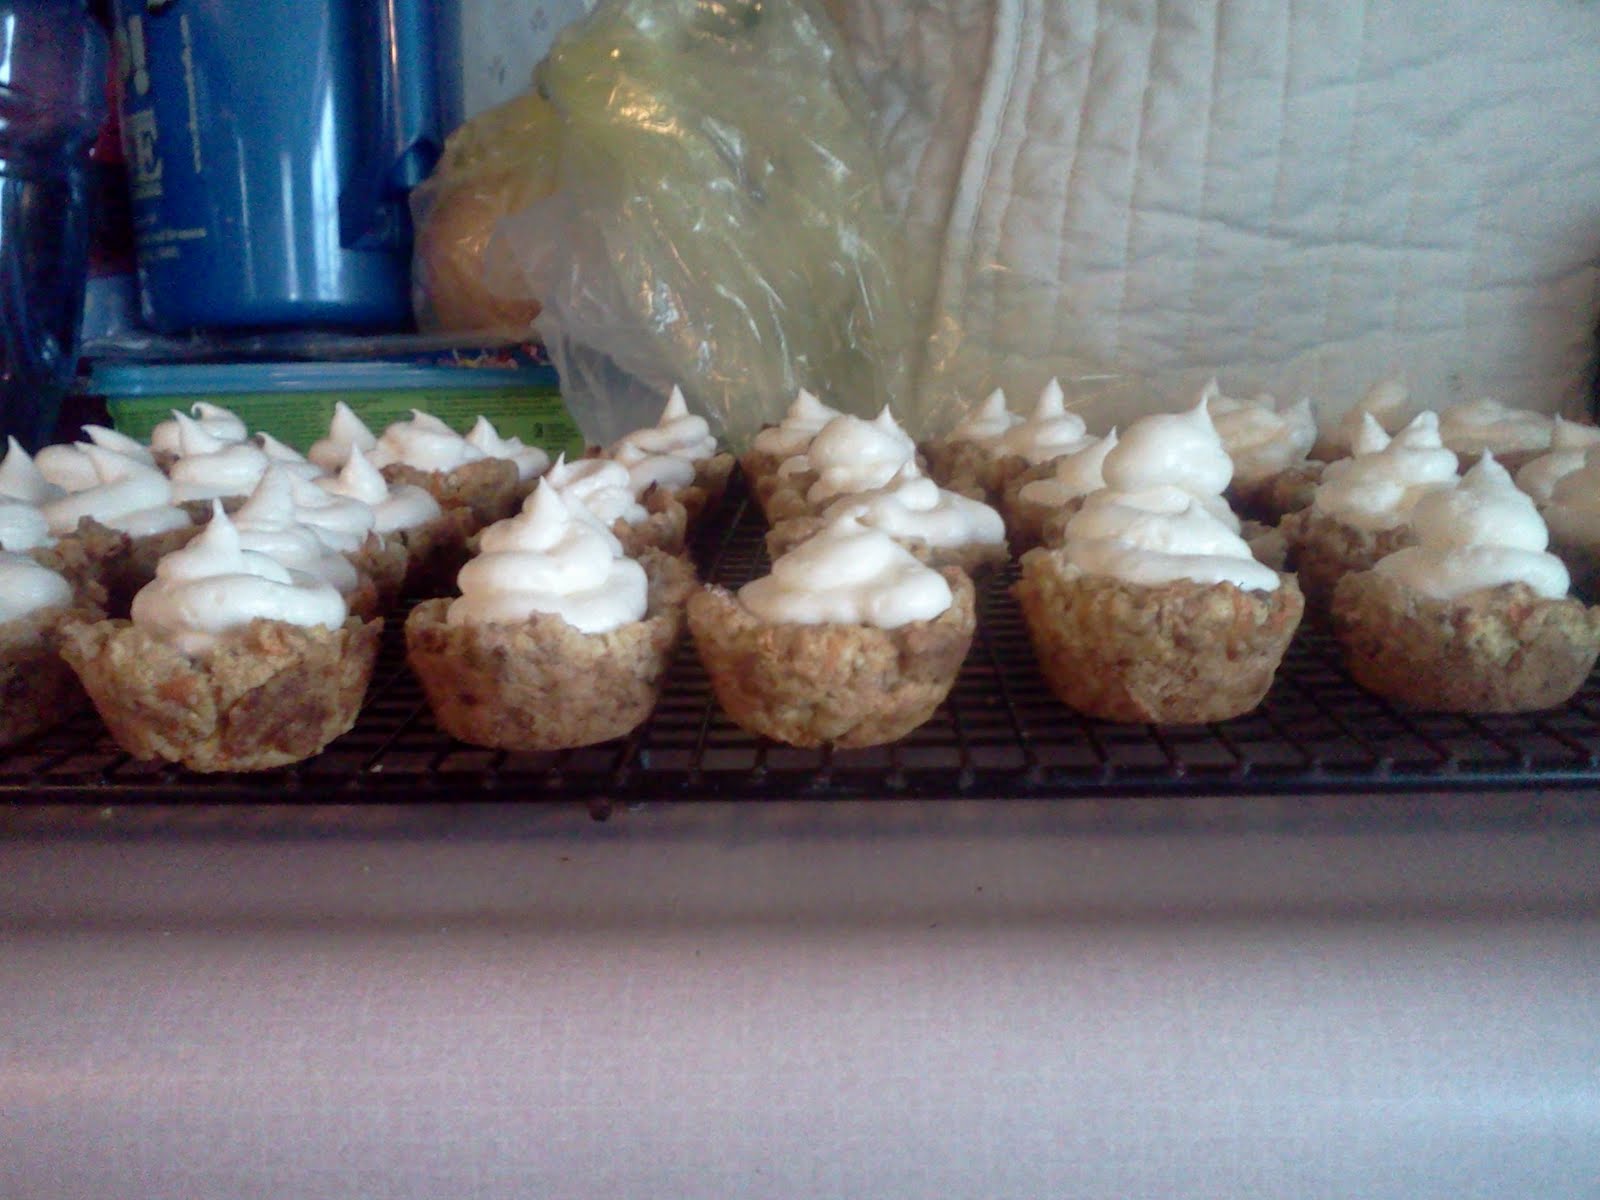
Here's my finished products:
 Don't they look FABULOUS?!?
MINI CARROT CAKE CUPS
INGREDIENTS:
MINI CAKES:
1 Small Pkg. Yellow Cake Mix (9oz.)
1 1/2 tsp. All Spice
1 Egg
2 Tbsp. Vegetable Oil
2 Medium Carrots; peeled, divided
FILLING & GARNISH:
6 Oz. Cream Cheese; softened
3/4 C. Powdered Sugar
1/2 C. Cool Whip; thawed
Chopped Walnuts (optional)
Preheat oven to 350. Spray cups of Deluxe Mini-Muffin Pan with nonstick cooking spray. For mini-cakes, combine Cake Mix, Allspice, Egg and Oil in Classic Batter Bowl; stir until ingredients are moistened. (Mixture will be very thick. Grate carrots using Ultimate Mandoline fitted with grating blade. Stir 3/4 Cup of the Carrots into batter; set aside remaining carrots for garnish. Using Adjustable Measuring Spoon, divide batter evenly among cups, filling cups about two-thirds full; bake 11-13 minutes or until mini-cakes feel firm to the touch. Meanwhile, in clean Batter Bowl, whisk together Cream Cheese and Sugar until smooth; fold in Cool Whip. Spoon Cream Cheese Mixture into resealable plastic bag (I used Easy Accent Decorator); secure bag and set aside. Remove pans from oven to Stackable Cooling Rack. Press tops of mini-cakes with lightly floured Mini-Tart Shaper to make slight indentations. Cool in pan 3 minutes. Carefully remove mini-cakes from pan; cool 5 minutes. Trim corner of Cream Cheese-filled Bag with Utility Knife; pipe filling evenly into mini-cakes. Garnish with Chopped Walnuts and reserved Carrots, if desired.
Here's my finished products:
Subscribe to:
Posts (Atom)