Thursday, March 10, 2011

Lots Of Activity In My Kitchen

I have been spending a lot of time in my kitchen lately...I'm not complaining about it at all. I have made some pretty yummy stuff as of late and have a lot that I want to share with all of you today!

Earlier this week a site that I like on Facebook posted a picture of a Lemon Tart that they had made, and it looked delicious!!!! It had me drooling, and got me thinking....I had a large lemon in the house that I needed to use up and thought that instead of using it in my drinking water I would bake something with it...GOOD IDEA!!!! :-) Another friend of mine had commented on the Facebook picture and since I was going to be seeing her at BSF on Wednesday morning I thought it would be nice to share! She was thrilled, and I was glad to make her smile!

THE BEST LEMON BARS:

Here's what you will need:
The Lemon is larger than it appears!!!

INGREDIENTS:
CRUST:
1 C. Butter; softened
1/2 C. Sugar
2 C. Flour 

FILLING:
4 Eggs
1 1/2 C. Sugar
1/4 C. Flour
2 Medium Lemons or 1 Large Lemon; juiced (I zested half of the lemon before juicing it)

Preheat oven to 350. In a medium bowl, blend together softened butter, 2 cups flour and 1/2 cup sugar. Press into the bottom of an ungreased 9x13 inch pan. Bake for 15 to 20 minutes in the preheated oven, or until firm and golden. In another bowl, whisk together the remaining 1 1/2 cups sugar and 1/4 cup flour. Whisk in the eggs and lemon juice (and zest if you so desire a little extra flavor). Pour over the baked crust. Bake for an additional 20 minutes in the preheated oven. The bars will firm up as they cool. I sifted powdered sugar over the top of mine.

***NOTE*** You could also substitute Limes for the Lemons and make Lime Bars this way as well! MMMM The crust is a bit thick in the pan when pressed in, but it does thin out during the baking with the lemon filling.

Here they are cut and ready to take to Bible Study to give to E VT:
Yummy!
Look at that Lemony goodness!

I did take some and share them with my Momma tonight, as she is in town taking care of two of the cutest girls I know! Mom loves lemon as much as I do, so I think she was pretty happy to have the treat! And since Dad had to stay home because he has to work, I will be making a special treat for Mom to take home with her to him on Saturday...Doesn't he have such a nice daughter?!?! Hahaha ;-)

This next recipe was something that we NEVER would've had at our house growing up because Dad despises this with all that is in him! Even if this were the last possible meal on earth, he would PASS in a heartbeat and starve...I'm being serious here people. Even the meer mention of this makes him visibly cringe...Wowza!!!

HOMEMADE MACARONI & CHEESE

Here's what you will need for this oh so yummy comfort food:
INGREDIENTS:
4 C. Dried Macaroni
1  Egg; beaten
¼ C. (1/2 Stick Or 4 Tablespoons) Butter
¼ C. Flour
2-½ C. 2% Milk
2 tsp. (heaping) Dry Mustard, More If Desired (I used the recommended, but would use probably only 1 tsp. next time)
1 Lb. Cheese, Grated (I used Sharp Cheddar)
½ tsp. Salt, More To Taste
½ tsp. Seasoned Salt, More To Taste (I used Lawry's)
½ tsp. Ground Black Pepper
Optional Spices: Cayenne Pepper, Paprika, Thyme (I sprinkled Paprika on the top)

Cook macaroni until very firm. Macaroni SHOULD BE too firm to eat right out of the pot. Drain.
In a small bowl, beat egg. In a large pot, melt butter and sprinkle in flour. Whisk together over medium-low heat. Cook mixture for 2 minutes, whisking constantly. Don’t let it burn. Pour in milk, add mustard, and whisk until smooth. Cook for five minutes until very thick. Reduce heat to low.Take 1/4 cup of the sauce and slowly pour it into beaten egg, whisking constantly to avoid cooking eggs. Whisk together till smooth. Pour egg mixture into sauce, whisking constantly. Stir until smooth. Add in cheese and stir to melt. YOU MAY TURN THE STOVE OFF AT THIS POINT) Add salt and pepper. Taste sauce and add more salt and seasoned salt as needed! Pour in drained, cooked macaroni and stir to combine. You may serve immediately (very creamy) or pour into a buttered baking dish, top with extra cheese, and bake for 20 to 25 minutes or until bubbly and golden on top.

I chose to bake mine. Here it is ready for the oven:

All bubbly after baking:

I could almost taste this when I took this picture! YUMMY

It gets a little crunchy on the top, but that just hides the creamy, smooth goodness underneath:
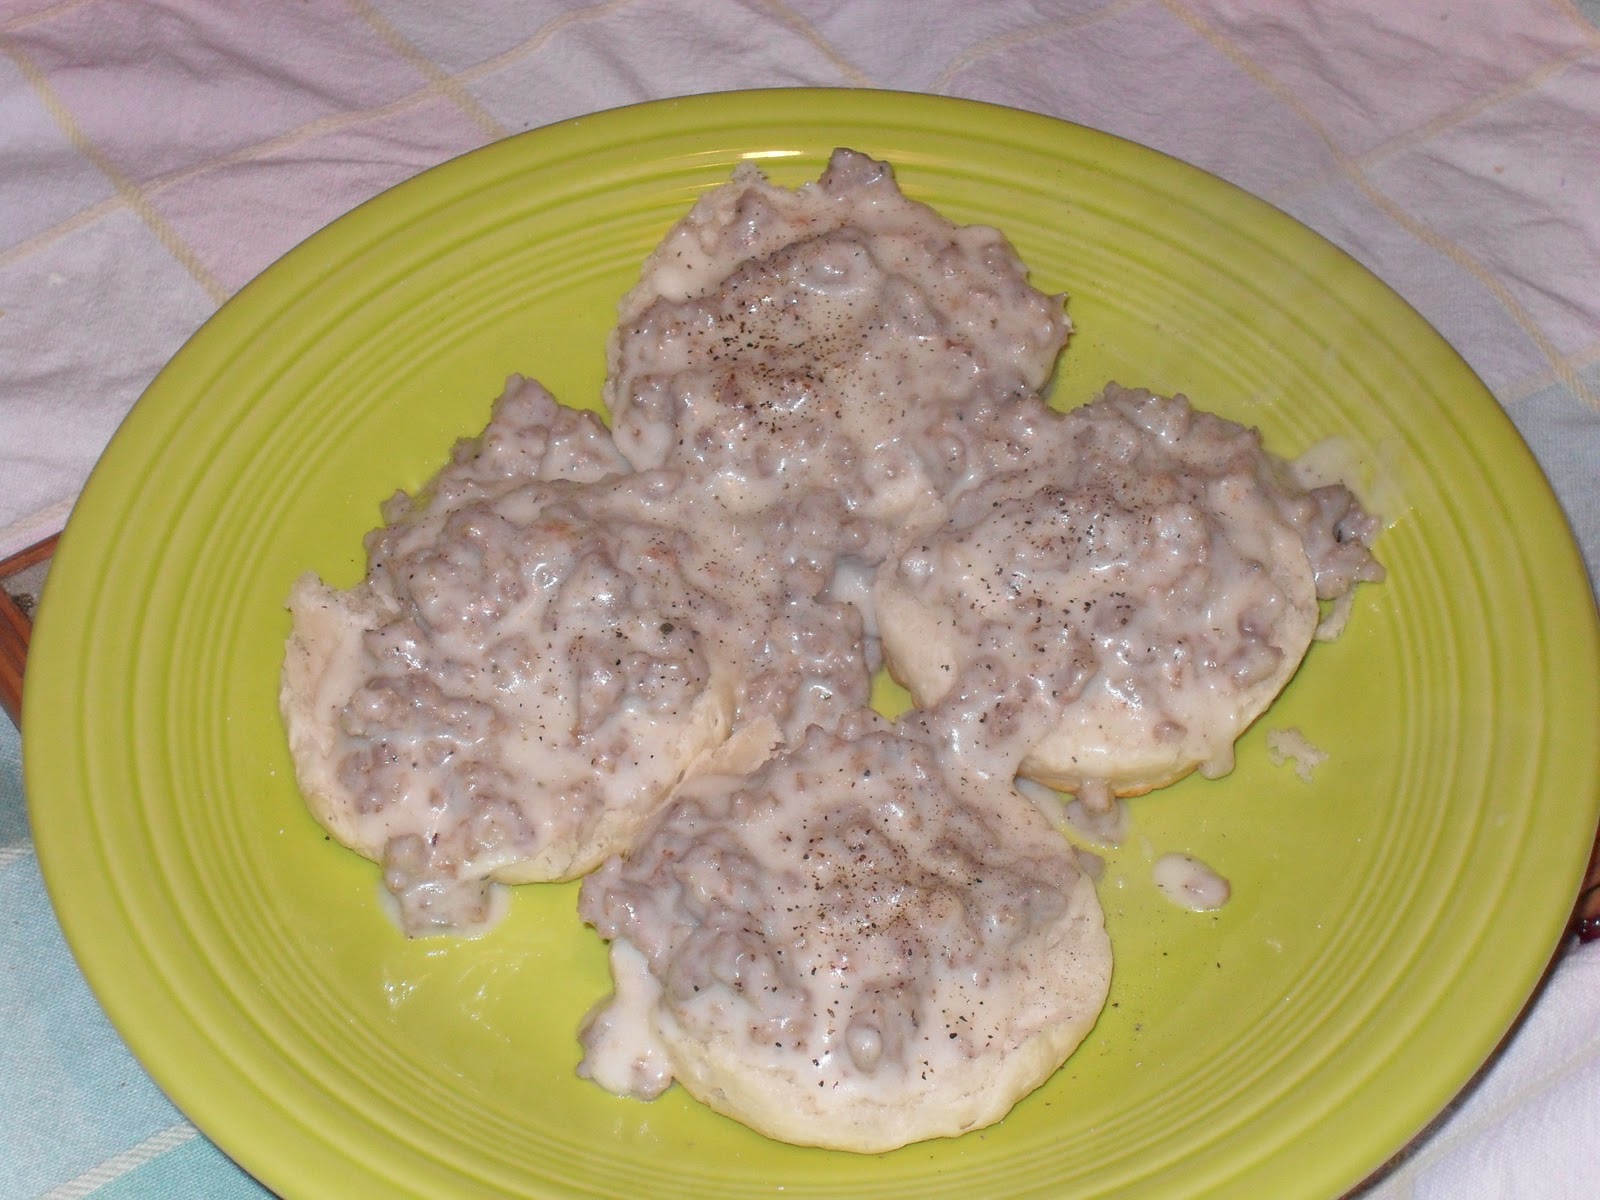
This was last nights dinner.

So today I ventured on over to my friend E's house to deliver some items to her, and we also sat down and made the Menu Board for my house. I'm so excited about it, and it turned out great! We used her Cricut to cut out the letters, and it was so smooth and easy. It looks so much better than the one that I made as a template!!!

Here is the finished product:
What do you think?

Last week on Saturday E. and her husband S. had a function they needed to go to, so I went over to stay with their adorable little ones while they took their naps and then we ventured out to go see their Mommy & Daddy when they woke up. Well, E. had made some seriously DELICIOUS bars and she sent me home with some. I may have had something to do with the fact that I brought some homemade salsa over there that day....No, I think it's just because she is such a great friend! I am not a huge chocolate fan, but I will say that I could eat these ANY day, they are that good! So, when I was over there today I asked her if she would share the recipe with me and if she minded if I posted it here on the blog...she happily obliged. So this next recipe is thanks to E. and ALL of the credit goes to her.

MISSISSIPPI MUD BARS

INGREDIENTS:
1 (12 oz.) Pkg. Chocolate Chips
1 Can Sweetened Condensed Milk
2 Tbsp. Butter
1/2 tsp. Salt

Melt the above ingredients together in the microwave and set aside.

1 C. Butter
2 C. Brown Sugar
2 Eggs
2 tsp. Vanilla

Cream these ingredients together. Then add:
2 1/2 C. Flour
1 tsp. Baking Soda
1 tsp. Salt
3 C. Oatmeal

Put 3/4 of the dough mixture in a jellyroll pan and then pour the chocolate mixture on top and spread it out. Then drop the rest of the dough mixture onto it. Bake at 350 for 25 minutes.

Here is what they should look like:
This is the last one in our house from her, glad it survived so you could see it. It won't be around much longer!

I have a special announcement coming by the beginning of next week. Keep checking back for it, it's something you won't want to miss!

Wednesday, March 9, 2011

~A Request From A Friend~

I had a friend leave me a message on my Facebook Wall this morning asking for a recipe for Brisket, as it's on sale this week. I promised her that I would post one! So this will just be a quick post before I head out the door for Bible Study this morning. Hmmm, this actually sounds really good to me on this cold, rainy morning here in Michigan.

BEST EVER BEEF BRISKET

INGREDIENTS:
2 Tbsp. Chili Powder
1 Tbsp. Salt
1 Tbsp. Garlic Powder
1 Tbsp. Onion powder
1 Tbsp. Black Pepper
1 Tbsp. Sugar
1 Tbsp. Seasoned Salt
1 (4 pound) Beef Brisket
1 1/2 C.  Beef Broth

Preheat oven to 350. Combine the chili powder, salt, garlic powder, onion powder, black pepper, sugar, and seasoning salt in a medium bowl, and blend thoroughly. Apply rub to surface of brisket. Cook brisket, uncovered, in preheated oven for 1 hour. Remove from oven and add beef broth to roasting pan. Lower oven temperature to 300 degrees F, cover roasting pan tightly with foil, and cook 3 more hours. Let brisket rest 30 minutes before slicing.


I hope that this works for you E. and that you and your family will enjoy it!!! Let me know how it turns out!!!

Tuesday, March 8, 2011

It Was Like The Day After Thanksgiving Here!

Well, okay not quite considering that it's March! But the supper we had tonight was reminiscent of Thanksgiving! YUM  This was a recipe that had all of those flavors rolled into one great big meal.

We had:

SLOW COOKER THANKSGIVING

Here are some of the ingredients you will need:
INGREDIENTS:
5 C. Dry Bread Cubes
1/4 C. Instant Stuffing Mix
1 C. Fresh Mushrooms; sliced
1/2 C. Onion; chopped
1/2 C. Celery Chopped
1/4 C. Olive Oil
1 tsp. Poultry Seasoning
1/2 tsp. Salt
1/4 tsp. Dried Sage
1/4 tsp. Black Pepper
1 (12 oz.) Jar Turkey Gravey
1 (10.75 oz.) Can Cream Of Mushroom Soup
1/2 (16 oz) Can Cranberry Sauce
4 Bonless; skinless chicken breasts; cubed

Toss together 2 1/2 cups dry bread cubes and 2 tablespoons instant stuffing mix; set aside. Combine the remaining bread cubes, instant stuffing mix, mushrooms, onion, celery, olive oil, poultry seasoning, salt, sage, pepper, gravy, condensed soup, and cranberry sauce in a large bowl. Place the reserved bread crumbs and stuffing mix into the bottom of the slow cooker. Add the chicken and top with the vegetable, bread, and gravy mixture. Cover, and cook on Low for 4 to 6 hours.

***DISCLAIMER*** I added carrots to this since I had them in the house and needed to use them up. I also served this with an additional can of cranberry sauce on the side to use on the top. This does not look very appetizing at all when it is in the crock-pot, nor when served...but it really was good. Not something I would make every single week, but was good tonight. I would probably omit the gravy next time and use the Mushroom soup and about a 1/2 can of milk to dilute a bit. I did mix all of the stuffing and breadcrumbs through as the ones on the bottom would have burned if I hadn't.

Here it is ready to cook:
And after having cooked for 5 1/2 hours:

My mom was here to enjoy dinner with us tonight, as she will be in town for the rest of the week. It was nice to have her here. We spent the day looking for a new(er) washer & dryer as we need one! I'm happy to say that we found a set and got a really good deal on them. Craigslist is a wonderful place! :-)  Anyway, Mom enjoyed the dinner but agreed that it's not something she would want to eat all of the time. I think that she enjoyed this next recipe a whole lot more! ;-)

The bro is going to hang out with friends and watch a recording of the Arsenal vs. Barcelona soccer game that happened earlier today, at a friend house tonight. This particular friend loves this next recipe and since J. is going to be at P's house, who is hosting the event I made these for everyone to enjoy! Although, I cannot take credit for the recipe...This one is from the Pioneer Woman, and boy can that woman cook!

APPLE DUMPLINGS

Here's what you'll need to make these:

And YES that is a can of MT. DEW that you see there! Oh, it makes these so yummy!!!!

INGREDIENTS:
3 whole Granny Smith Apples
3 cans (8 Oz. Cans) Crescent Rolls
2 sticks Butter
1-½ C. Sugar
1 tsp. Vanilla
Cinnamon, To Taste
1 can (12 Oz.) Mountain Dew Soda

Cut each apple into 8 slices each. Roll each apple slice in a crescent roll. Place in a 9 x 13 greased pan. You will have to squeeze all of them in! Melt butter, then add sugar and barely stir. Add vanilla, stir, and pour entire mixture over apples. Make sure each one has some of this yummy goodness on it! Pour Mountain Dew around the edges of the pan and down the center of each row. Sprinkle with cinnamon and bake at 350  for 40 minutes. Serve with ice cream, and spoon some of the sweet sauces from the pan over the top.

After the apples are rolled:

Before Baking:

And of course after they have come out of the oven:

Oh these are so good!!!! I can almost taste them looking at this picture! Sorry guys but you didn't think that you were going to get to enjoy them ALL now did you? NOPE, had to share some with the Momma and I had to have one too. After all I put all of the HARD WORK (snicker, snicker) into making them! I hope that you all enjoyed them tonight!

Breakfast For Supper!

I don't normally make a big fancy breakfast around here. It normally consists of cereal and milk, and that's about it! So the other night we decided that we wanted to have breakfast for supper, it just sounded really good. So, I decided to make this recipe and it turned out great! I will definitely make it again.

EASY SAUSAGE GRAVY & BISCUITS

What you will need:
INGREDIENTS:
1 (16 oz) Can Refrigerated Jumbo Buttermilk Biscuits
1 (9.6 oz) Pkg. Jimmy Dean Original Pork Sausage Crumbles
1/4 C. Flour
2 1/2 C. Milk
Salt and Black Pepper; to taste

***NOTE*** I used a roll of storebrand sausage as it was WAY cheaper than paying almost $4.00 for the bag of crumbles! And it turned out just fine, only a few more minutes of cook time.

Bake biscuits according to package directions. Meanwhile, cook sausage in large skillet over medium heat 5-6 minutes or until thoroughly heated, stirring frequently. Stir in flour. Gradually add milk; cook until mixture comes to a boil and thickens, stirring constantly. Reduce heat to medium-low; simmer 2 minutes, stirring constantly. Season to taste with salt and pepper. Split biscuits in half. Place 2 halves on each of 8 plates; top with about 1/3 cup gravy.

Here it is:
They were so good, and hit the spot! Only took about 15 minutes to make them, can't beat that!

So, I have another recipe to share with you but I need to be honest and tell you that they didn't turn out exactly as the recipe said that they would! At first I didn't see the humor in it, but after a little while I could laugh at it! :-) I will explain more about this after I share the recipe. And oh, by the way, they still were delicious. And the best part is they are HEALTHY!!!!!

GLAZED LEMOND CUPCAKES WITH RASPBERRIES

Here are some items you will need:


INGREDIENTS:
1 Lemon
3/4 C. Sugar
3 Tbsp. Canola Oil
1/2 C. Plain Nonfat Yogurt
1/3 C. 2% Milk
1 Tbsp. Lemon Extract
1 1/4 C. Flour
3/4 tsp. Baking Soda
1/4 tsp. Salt
2 Egg Whites; Room Temperature
1/4 C. Raspberry Pastry Filling

FOR GANACHE & GARNISH:
3 Squares (1 oz. each) White Chocolate Baking Chocolate; chopped
2 Tbsp. Plain Nonfat Yogurt
1 1/2 tsp. Lemon Extract
12 Fresh Raspberries

***NOTE*** If you don't have pastry filling you may use 1/4 C. Raspberry Jam mixed with 1 tsp. Cornstarch.

Preheat the oven to 350. Place cupcake liners in wells of 12-cup muffin pan (I omitted liners). Zest the Lemon to measure 1 Tbsp. In mixing bowl, combine Sugar and Oil; whisk together. Add Lemon Zest, Yogurt, Milk & Lemon Extract; whisk until well blended. Combine the Flour, Baking Soda, & Salt; mix well. Sift Flour mixture into wet ingredients; whisk until well blended. Using a clean whisk, whisk Egg Whites vigorously for 1 minute or until very foamy; fold into batter. Immediately scoop batter into muffin cups. Using a small scoop place a scant amount of Pastry Filling (or Jam mixture) onto centers of cupcakes; push in gently with back of spoon. Bake 15-17 minutes or until tops spring back when lightly pressed. Remove pan from oven to cooling rack and let stand 5 minutes. Remove cupcakes from tin. Meanwhile, for ganache, place Chocolate in a small microwave-safe bowl and microwave on High 45-60 seconds or until almost melted; stir until smooth. Stir in Yogurt, and Lemon Extract. Dip tops of cupcakes into ganache, coating tops evenly. Garnish with Raspberries.

***NOTE*** The Pastry Filling or Jam & Cornstarch are supposed to keep the Raspberry Filling from spreading! It didn't! Mine settled in the bottom and actually popped out the bottom when I took the cupcakes out of the tin. I just scoopped it back in and put the ganache on that side of the cupcake and they were still just as good. Although, next time I will probably omit the filling.

Here are what mine turned out like:
Just like  a mini cake! YUM


Plated up, all pretty! This recipe makes 12 cupcakes, so it's not a huge batch.

All in all they were still very tasty!

Friday, March 4, 2011

Who Doesn't Like A Little Salsa????

At our house we love salsa! Not the chunky, tomatoey version you can buy at the store...Although I do use that in some of my recipes. But, the homemade kind! I think I hear a few of you saying "Ughh" out there! But really I have some very simple, easy recipes to share with you! Most of these are new recipes to me that I was turned on to...most of them are Pampered Chef recipes, and thus very simple, fast and easy...Not to mention LOW COST!!!!

Today the brother asked me if I would make him some salsa, and since he is not feeling the greatest I was happy to oblige. I asked him what kind he would like and he replied with this:

CHUNKY ARTICHOKE SALSA:

Here are the items you will need:
**NOTE** You will also need 2 Large Roma Tomatoes

INGREDIENTS:
1 (6.5 oz.) Jar Marinated Artichoke Hearts; undrained
1/4 C. Pitted Olives; drained
2 Tbsp. Onion; chopped (You may use any type of onion you would like. I normally use red, but had yellow in the house)
2 Large Plum Tomatoes (Roma)
1/2 tsp. Garlic
1 tsp. Basil (or 2 Tbsp. Fresh Basil; snipped)
Salt & Pepper to Taste

Drain the marinade from artichokes into bowl; reserve. Chop the artichokes (using a Food Chopper or Food Processor if you have one, if using a Food Processor leave liquid with artichokes). Chop artichokes, olives and onion. Dice the tomatoes (If using a Food Processor add them to mixture and pulse until chopped). Place all into a bowl and add the garlic, basil, salt and pepper and mix together.

Here is my salsa from today:

I always put my salsa in the fridge after I make it to let the flavors meld together. It really brings out the taste, but you may serve immediately as well and it is still FABULOUS!

I have a few more recipes to share with you as well!

APPLE BERRY SALSA WITH CINNAMON CHIPS

INGREDIENTS:

CINNAMON CHIPS:
4 7-inch Flour Tortillas
1 Tbsp. Sugar
1/2 tsp. Cinnamon

Heat oven to 400. Lightly spray tortillas with water. Mix the cinnamon and sugar together and sprinkle over tortillas. Cut tortillas using a pizza cutter into 8 wedges and bake in the oven for 8-10 minutes; until lightly browned and crispy.

APPLE BERRY SALSA:
2 Medium Granny Smith Apples
1 C. Strawberries
1 Kiwi
1 Small Orange
2 Tbsp. Brown Sugar; packed
2 Tbsp. Apple Jelly

Peel and slice the apples. Chop the apples into pieces (with a Food Chopper or in a Food Processor). Chop the strawberries and Kiwi (again with Food Chopper or put into Food Processor with the apples). Zest the orange and then juice the orange. Add the zest, juice, brown sugar and apple jelly to the fruit mixture and stir together. Serve with Cinnamon Chips.

CUCUMBER MANGO SALSA

INGREDIENTS:
1 Jalapeno Pepper; seeded
1 1-inch piece of gingeroot peeled (may substitue 1/2 tsp. ground ginger)
1/2 C. Fresh Cilantro; chopped
2 Cucumbers
2 Mangos; peeled
1 C. Pomegranate Seeds

Chop the jalapeno, ginger root and cilantro. Peel the cucumbers and remove the seeds. Chop the cucumber and add to the jalapeno mixture. Chop the mango and add to mixture. Transfer to serving bowl and mix in pomegranate seeds.

ROASTED TOMATO SALSA

INGREDIENTS:
12 Plum Tomatoes
1 Tbsp. Olive Oil
1/4 C. Water
1 1/2 tsp. Chili Powder
1 tsp. Salt
2 Garlic Cloves

Heat oven to 450. Line a large baking sheet with Parchment Paper. Cut the tomatoes in half and remove the seeds. Place tomatoes on the bar pan and drizzle with the olive oil, tossing gently to coat. Arrange tomatoes cut side up on baking sheet and bake for 45 minutes or until tomatoes are slightly shriveled. Cool. (If you have a Food Processor, place the tomatoes, water, Chili, Salt and Cloves in it and pulse). Chop tomatoes, garlic and then mix with rest of ingredients.

WATERMELON & PEACH SALSA

INGREDIENTS:
1 Jalapeno Pepper
1/4 C. Fresh Cilantro; chopped
2 C. Watermelon; cubed
2 Small Peaches
1 Lime
1/4 tsp. Salt

Remove seeds from Jalapeno. Chop the Jalapeno and cilantro; set aside in bowl. Dice the watermelon and add to jalapeno mixture. Discard the pits from the peaches, and dice the peaches into fine pieces. Add to the watermelon mixture. Juice the lime over the top, add the salt and mix well.

MANGO CONFETTI SALSA

INGREDIENTS:
1 Large Mango
1/2 Small Jicama
1/3 Orange Bell Pepper
1/3 Red Bell Pepper
1 Jalapeno; stemmed
1/3 Small Red Onion
1 Tbsp. Fresh Lime Juice
1/4 tsp. Salt
1/4 tsp. Chili Lime Rub (You can also use Chili Powder, or Chipotle Rub)

Cut the Mango and remove the skin. Peel the jicama. Dice mango, jicama and bell peppers. Cut the jalapeno in half and dice. (If you have Food Processor put all of these into it and pulse until coarsely chopped), otherwise chop finely. Add lime juice and salt, mix together. Pour into serving bowl and sprinkle with seasoning.

I made this salsa last week and omitted the jicama since I couldn't find one at the grocery store, and it was wonderful! The flavors mix together so well, the longer it sat the better it tasted!

I hope that you will find these recipes easy and helpful and that you will make some salsa for yourself or your family! I have few more recipes if you are interested, just leave me a comment and I will post them!

Wednesday, March 2, 2011

Are You Seeing A Theme Here?

I was looking through my posts lately, and comparing my menu plan for this week and I had to ask the brother if he saw the theme in my plans lately. He promptly replied, "Chicken, but I don't mind." Today is no exception...Sorry!

Today's menu included Slow-Cooker Chicken Stroganoff & Herbed Biscuits...along with leftover Sweet Potato Casserole. It was a mighty tasty meal, if I do say so myself.

SLOW-COOKER CHICKEN STROGANOFF:

Here are the items you will need:

INGREDIENTS:
4 Bonless Chicken Breast; cubed
1/8 C. Margarine
1 (.7 ounce) Package Dry Italian-style salad dressing mix
1 (8 oz) Package Cream Cheese
1 (10.75 ounce) Can Cream of Chicken Soup
1 (1 lb.) Package Egg Noodles; cooked per directions

Put chicken, margarine and dressing mix in slow cooker; mix together and cook on low for 5 to 6 hours. Add cream cheese and soup, mix together and cook on high for another 1/2 hour or until heated through and warm. Serve over egg noodles.

HERBED BISCUITS:

What's needed:
INGREDIENTS:

1 (12 ounce) Package Refrigerated Buttermilk Biscuits
1/2 C. Butter; melted
1 1/2 tsp. Dried Parsley (I didn't have, so I omitted)
1 1/2 tsp. Dried Dill Weed
1/4 tsp. Dried Minced Onion

In a medium bowl, blend melted butter with the dried parsley, dill weed, and onion flakes. Cut buttermilk biscuits into quarters. Roll each biscuit quarter in herb butter. Place in 8 inch cake pan, with pieces touching. Pour remaining butter over biscuits. Bake in a 425 oven for 12 minutes. Serve warm.

***I didn't cut the biscuits, I used them as they were and they turned out fine.***

After coming out of the oven:
They smelled so good! Here's what I had for dinner tonight!:


I noticed that we had some bananas on our counter that were at the point they were turning, and the only thing you can really do with them is bake something. Normally when this happens I make Banana-Chocolate Chip Loaf, but today the brother asked me if I would mind finding another recipe that I could make with them. Something new and different. I told him that I would look. I bought these bananas solely for him, as I have a severe Latex Allergy, and since bananas come from the rubber plant my system can only handle about a 1/2 of a banana every few days. Even then, I still break out in a little bit of a rash, but not so bad that I would complain about it...I still LOVE bananas. So, I scoured the internet today and I found a recipe for some Banana Cookies on the blog Simply Recipes. I decided to give them a go! They smell FABULOUS!!!

BANANA COOKIES

What you will need:

INGREDIENTS:
1/2 C. Unsalted Butter, room temperature
1 C. Sugar
1 Egg, room temperature
1 C. Mashed Bananas
1 tsp. Baking Soda
2 C. Flour
Pinch of Salt
1/2 tsp. Cinnamon
1/2 tsp. Ground Nutmeg
1/2 tsp. Ground Cloves
1 C Pecans (walnuts and chocolate chips are fine alternatives)

Preheat the oven to 350°F. Cream the butter and sugar together until light and fluffy. Add the egg and continue to beat until the mixture is light and fluffy. In a bowl, mix the mashed bananas and baking soda. Let sit for 2 minutes. The baking soda will react with the acid in the bananas which in turn will give the cookies their lift and rise. Mix the banana mixture into the butter mixture. Mix together the flour, salt, and spices and sift into the butter and banana mixture and mix until just combined. Fold into the batter the pecans or chocolate chips if using. Drop in dollops onto parchment paper-lined baking sheet. Bake for 11-13 minutes or until nicely golden brown. Let cool on wire racks.

Here are a few of the finished product:

I'm sure that once J. gets home from bowling with his Cadets from church, he will enjoy some of these! As I said earlier, they smell AMAZING! I think it's the combination of cinnamon, nutmeg and cloves! They were super easy to make as well, I hope that you will give them a try.

Tuesday, March 1, 2011

This Is What Was Cooking In My Kitchen Today!

Today this sister was spacing out a bit...but it all turned out alright! I totally forgot that the brother J. had to go and fulfill his Cadet Counselor duties at the Pinewood Derby tonight. Good thing that my plans for dinner were something quick and easy! Whew!!!!!

A while ago I saw an awesome idea for a Menu Board that my friend E. had made for her house! I thought that this was an ingenious idea and I asked her if she would make one with me. She, of course, said that she would be more than happy to do that. Since we haven't coordinated schedules yet to do this, I made a makeshift one to hang in my kitchen until I replace it with the new one.

Here it is:

I just used stickers on the scrapbook paper, and then put it in an extra picture frame that I had in the house. Using Dry-Erase Markers to write on the glass works marvelously!!!! When I have the other one done (I will use this frame as well), I will post a picture of it! Thanks E. for the GREAT idea!!!!

Now, on to today's menu. We enjoyed a very delicious dinner at our house tonight.

15-MINUTE HERBED CHICKEN

Some items you will need:

INGREDIENTS:
1 Tbsp. Vegetable Oil
4 Chicken Breasts; boneless, skinless
1 (10.75 ounce) Can Condensed Cream of Chicken with Herbs Soup (I used regular Cream of Chicken Soup and added my own dry seasonings)
1/2 cup milk
Rice

Heat oil in skillet. Add chicken and cook until browned. Add soup and milk. Heat to a boil. Cover and cook over low heat 5 minutes or until done. Serve over rice.

We needed a side dish to go along with this.  While on the phone with my Mom this weekend she asked me to post the recipe for this particular side dish. I had to laugh, and told her that it was already on my Menu Board for this weeks meals, so it would definitely be posted this week!

SWEET POTATO CASSEROLE:

Items you will need:
Is it sad that the side dish requires more items than the main course? I think it's kind of funny!

INGREDIENTS:
1 (40 ounce) Can Cut Sweet Potatoes, undrained
1 C. Sugar
2 Eggs
1/3 C. Butter
1/3 C. Milk
1 tsp. Vanilla

TOPPING: 
1 C. Packed Brown Sugar
1 C Chopped Pecans
1/3 C. Flour
1/3 C. Butter; melted

Preheat oven to 350. Grease a square baking pan. Place the sweet potatoes and their liquid in a medium saucepan, and bring to a boil. Cook 15 minutes, or until tender. Remove from heat, drain, and mash. In a medium bowl, mix the mashed sweet potatoes, white sugar, eggs, 1/3 cup butter, milk, and vanilla extract. Spread evenly into the prepared baking dish.
In a separate bowl, mix the brown sugar, chopped pecans, flour, and 1/3 cup melted butter. Sprinkle over the sweet potato mixture. Bake 35 minutes in the preheated oven, or until a knife inserted near the center comes out clean.

The sweet potatoes when added with all the other ingredients will be runny/watery, but will firm up when baking.

Ready for the oven:
Who would've thought that canned sweet potatoes could be so good! I have made this dish with regular sweet potatos from the produce section at the grocery store. I just took 3 medium sweet potatoes and baked them in a 350 oven until tender, then took the skin off and mashed and followed recipe accordinglt from there. But, really once you add all of the other ingredients you really cannot tell that these potatoes are from a can! Oh, the beauty of it all!

Here's what's for dinner:

I must say that the Rosemary Herb seasoning I used on the chicken was GREAT!  J. even made a comment about how much he enjoyed dinner tonight! Score one for the sister!!! That makes me very happy! I spent less than 40 minutes in the kitchen to prepare this meal, and I don't think that's too bad at all.

I would like to thank everyone for the comments that you all leave here, as well as all of you that have either commented on Facebook or come up to me in church to let me know you like what I've been posting. I have had several comments that my meal ideas have helped some of you come up with some new ideas, and that you've tried some of them and loved them! That puts a smile on this girls face! :-) I'm so glad that I can be of assistance, that was my hope and point in starting this blog. (Thanks for the nudge cousin J.!) Thank you all so much for the reassurance that it really was a good idea! I'm having so much fun posting, and I'm glad that you all are reading and using some of my ideas. THANK YOU BUNCHES